I just found this video and thought I would share. It's pretty spectacular!
Roy's Jeans - Video by Self Edge from Self Edge on Vimeo.
I want all of those machines!

Sunday, July 10, 2011


Tuesday, July 5, 2011
French Bias Binding Tutorial!
A sample I had to make for my FIDM sewing binder that I thought I would share...
 There are lots of great tutorials out there for working with bias binding. One of my favorite ways of using bias binding on a neckline or an armhole is doing the french bias binding method. In this method, the bias strip (usually 2" wide) is folded in half when attached and therefore double thickness of fabric.
There are two ways to attach the binding:
1) Topstitch from the front
2) Stitch in the Ditch from the front
I'm going to show you how to do the topstitching method and then explain the stitch in the ditch method!



French Bias Binding!

There are two ways to attach the binding:
1) Topstitch from the front
2) Stitch in the Ditch from the front
I'm going to show you how to do the topstitching method and then explain the stitch in the ditch method!

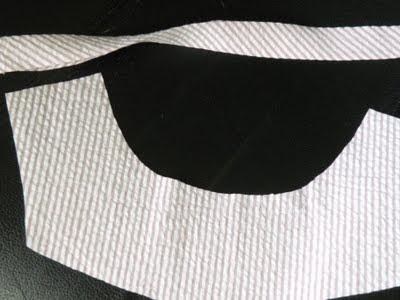
1. Above you see my neckline sample and a 2" wide bias strip.

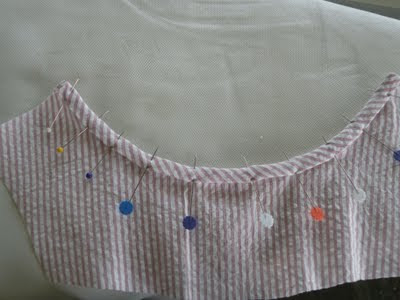
2. Fold bias tape in half, wrong sides together. Match the raw edges of the folded bias tape to the raw edge of the wrong side of neckline. Sew a 1/4" seam around the neckline.

3. Press the bias binding and the seam allowances up.

4. Fold the binding over to the right side just covering up the line of stitching.
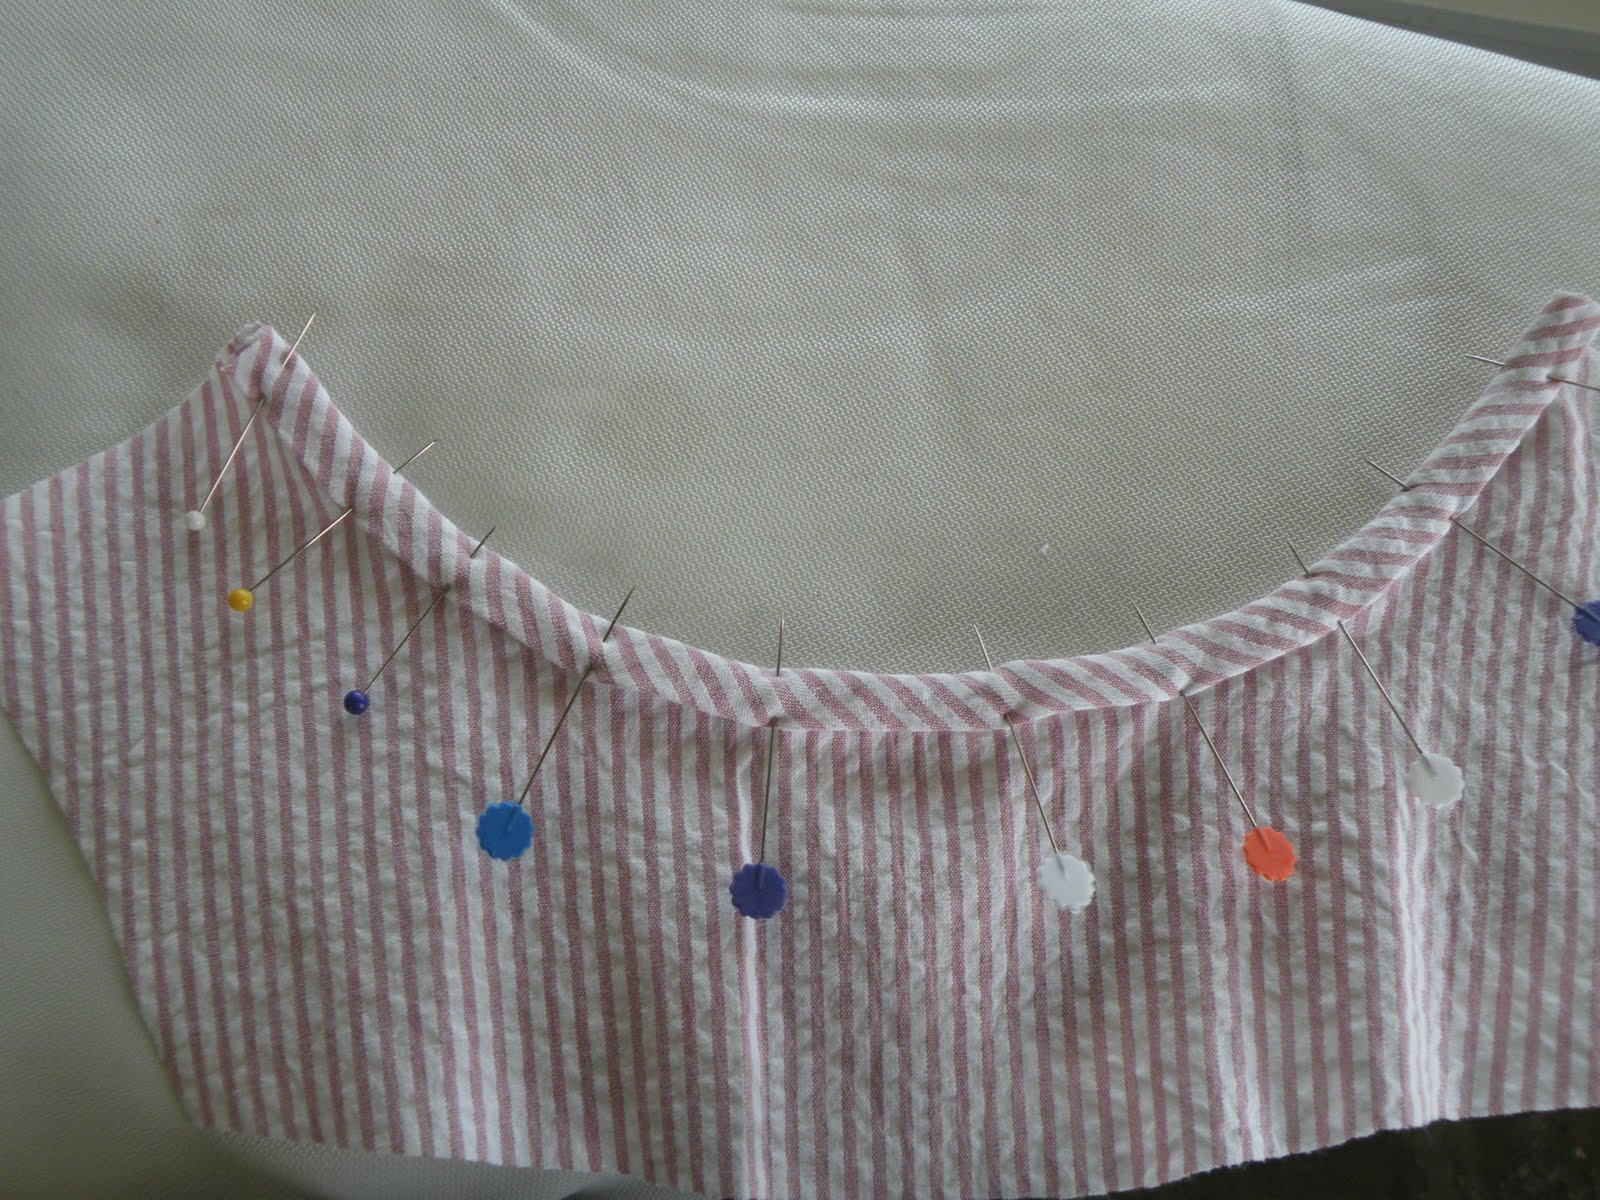
5. Pin in place (If you are real good, it's unnecessary).

6. Edge stitch the binding from the right side and you are done!
You can also hand stitch the binding down using a slip stitch (a blind stitch in which you stitch about 1/4" in the fold or tunnel of the binding, then take a small 1-2 thread "bite" of the main fabric, then continue back into the fold).
Okay so the other way you can do this is:
1) Fold bias tape in half, wrong sides together. Match the raw edges of the folded bias tape to the raw edge of the RIGHT side of neckline. Sew a 1/4" seam around the neckline.
2) Press the bias binding and the seam allowances up.
Okay so the other way you can do this is:
1) Fold bias tape in half, wrong sides together. Match the raw edges of the folded bias tape to the raw edge of the RIGHT side of neckline. Sew a 1/4" seam around the neckline.
2) Press the bias binding and the seam allowances up.
3) Fold the binding over to the WRONG side just covering up the line of stitching.
4) Pin in place.
5) Stitch in the ditch from the RIGHT side catching the folded over bias tape on the back.
Hope this was helpful! This is also a great way to bind quilts. Very sturdy, and crisp.
Also, thanks Nonissima for becoming the newest follower!
Saturday, July 2, 2011
One Lovely Blogger Award
Amanda over at Pandiola Lane gave me this "One Lovely Blog" Award! Thanks Amanda! Check out her blog :)

1. I love swapmeets and flea markets! Please share any good ones with me!
2. I really like the color of oatmeal.
3. I hate exercise. I need to get back into yoga or rock climbing, but I lack motivation.
4. I've read the Harry Potter books so many times over the years I have lost count.
5. I have never been good about keeping a journal. This blog is the closest thing to it.
6. I've never been camping/backpacking. I'd love to one day if there are showers and toilets :)
7. I'm such a perfectionist that I have a hard time wearing anything that I make. If it's not up to my standards, it just sits in my closet. :( I think I need to get over this.
So now I have to share 7 things about myself and pass along the award to other bloggers. So here it goes:
1. I love swapmeets and flea markets! Please share any good ones with me!
2. I really like the color of oatmeal.
3. I hate exercise. I need to get back into yoga or rock climbing, but I lack motivation.
4. I've read the Harry Potter books so many times over the years I have lost count.
5. I have never been good about keeping a journal. This blog is the closest thing to it.
6. I've never been camping/backpacking. I'd love to one day if there are showers and toilets :)
7. I'm such a perfectionist that I have a hard time wearing anything that I make. If it's not up to my standards, it just sits in my closet. :( I think I need to get over this.
"One Lovely Blog" recipients:
Pammie of Pammie and the P's
Shari of Shari Sews
Rachel of Shoes and Sewing
Angela of RiAnge Creations
Go check them out! All are lovely!
Pammie of Pammie and the P's
Shari of Shari Sews
Rachel of Shoes and Sewing
Angela of RiAnge Creations
Go check them out! All are lovely!
Thursday, June 30, 2011
Dare to Dirndl?
I did (and finally posted the pictures)!

Making a sloper is slow and arduous, so I decided to draft something easy. Plus I need more skirts. More solid colored skirts, really.
A few days after the end of the quarter, I ventured back into Patternmaking for Fashion Design (5th Edition) to draft up a dirndl with basic lapped waistband. Yes, I know a dirndl is just a gathered rectangle skirt, but did you know that for a better fit, you should drop the waistline 1/4" at CB and gradually taper back to the correct side seam length? Sounds counter intuitive, doesn't it!? Why would you want to shorted the back piece at the CB? There's a BOOTY back there! Well, I learned that the reason for doing so is that your waistline actually does curve down a bit at the small of your back. When you drape on a form, or draft patterns, you really start to notice these things. Unless you have an extra ample booty, drop that waistline seam down 1/4" and the skirt will hang nicely and evenly all the way around the hemline!
This is how I drafted my skirt (per Mrs. Armstrong's instructions):
1) Measure waistline (make sure it is comfortable and there is a bit of ease!) Let's say 26" (I realized that my waist is bigger now, sad!).
2) I chose a 2.5 to 1 gathering ratio so the total skirt width is 65". At the time I was thinking about adding inseam pockets, but got too lazy. (I wish I added them!) I still opted for side seams though. So I took 65" and divided it in 2. The front panel is 32.5" and the back panels will be 16.25" each. I wanted the zipper at center back. Because of such a large ratio, I ended up fudging the numbers slightly and went with 32" and 16". I also just assumed 1/2" seam allowance and did not add extra. What's the point, right?
3) The length I chose was 20": 1/2" SA for the waistline, and a 3" hem.
4) The waistband length or circumference is your waist measurement (26") plus 1" extension, plus 1/2" SA on either side. A total length of 28". For the width, I chose 1.5" finished. To do that, my width was 3" (1.5" x 2) plus 1/2" SA on the top and bottom for a total width of 4".
That's it! Those are your pieces. Oh, and like I mentioned before, shave off that 1/4" at the CB of both back panels and gradually taper back to the 20" length at the SS.
More pictures of the dirndl:

I love the trim! I was going to add a dainty crocheted lace trim, but my mom found this one instead. I think its perfect!
And this cute black and white vintage button finishes it off!

I really, really do recommend this book! Well worth the price.
Finally, thanks to Amanda, Jeanettec, Fabiana, Christina, Tiffany Reagan, and Becca! I know Tiffany Reagan and Becca both have blogs too, but I'm having trouble finding them. Both are awesome contributors on Sew Retro!

Making a sloper is slow and arduous, so I decided to draft something easy. Plus I need more skirts. More solid colored skirts, really.
A few days after the end of the quarter, I ventured back into Patternmaking for Fashion Design (5th Edition)
to draft up a dirndl with basic lapped waistband. Yes, I know a dirndl is just a gathered rectangle skirt, but did you know that for a better fit, you should drop the waistline 1/4" at CB and gradually taper back to the correct side seam length? Sounds counter intuitive, doesn't it!? Why would you want to shorted the back piece at the CB? There's a BOOTY back there! Well, I learned that the reason for doing so is that your waistline actually does curve down a bit at the small of your back. When you drape on a form, or draft patterns, you really start to notice these things. Unless you have an extra ample booty, drop that waistline seam down 1/4" and the skirt will hang nicely and evenly all the way around the hemline!This is how I drafted my skirt (per Mrs. Armstrong's instructions):
1) Measure waistline (make sure it is comfortable and there is a bit of ease!) Let's say 26" (I realized that my waist is bigger now, sad!).
2) I chose a 2.5 to 1 gathering ratio so the total skirt width is 65". At the time I was thinking about adding inseam pockets, but got too lazy. (I wish I added them!) I still opted for side seams though. So I took 65" and divided it in 2. The front panel is 32.5" and the back panels will be 16.25" each. I wanted the zipper at center back. Because of such a large ratio, I ended up fudging the numbers slightly and went with 32" and 16". I also just assumed 1/2" seam allowance and did not add extra. What's the point, right?
3) The length I chose was 20": 1/2" SA for the waistline, and a 3" hem.
4) The waistband length or circumference is your waist measurement (26") plus 1" extension, plus 1/2" SA on either side. A total length of 28". For the width, I chose 1.5" finished. To do that, my width was 3" (1.5" x 2) plus 1/2" SA on the top and bottom for a total width of 4".
That's it! Those are your pieces. Oh, and like I mentioned before, shave off that 1/4" at the CB of both back panels and gradually taper back to the 20" length at the SS.
More pictures of the dirndl:

I love the trim! I was going to add a dainty crocheted lace trim, but my mom found this one instead. I think its perfect!
 |
| The hem... I sewed a 3" invisible hem and then sewed the trim to the bottom. |
 |
| The waistband I topstitched the waistband down from the right side and caught the trim inside just above the gathers. |
And this cute black and white vintage button finishes it off!
 ! Well worth the price.
 Finally, thanks to Amanda, Jeanettec, Fabiana, Christina, Tiffany Reagan, and Becca! I know Tiffany Reagan and Becca both have blogs too, but I'm having trouble finding them. Both are awesome contributors on Sew Retro!
Monday, June 27, 2011
And the winner is...

FAYE LEWIS!!!
You've won the pattern!
Please email me at rofishman gmail com with your address and I will get the pattern to you ASAP!
Congrats to Faye and thanks to everyone for participating. I'll have more pattern giveaways periodically through the quarter.
The Boyfriend is in town now (hooray!) so I won't be sewing and probably not much blogging either. Still need to take pictures of the dirdl.
I wanna give a shout out to Melissa of Fehr Trade for hosting a Lekala pattern giveaway! I won 2 credits and plan to download 2 patterns very soon! These are the patterns I am considering:


I know I will wear the top and skirt more than the dress, so I'm leaning toward those patterns. What do you think?
Friday, June 24, 2011
Name that Sewing Machine?
Nine months ago my mom and I went to a church rummage sale and brought home two lovely vintage sewing machines, but we know nothing about them! They were just too pretty to pass up.
The first is a Model DST Deluxe Streamliner straight-stitch machine, made by Matsushita in Japan:


The second machine is a Queen? zigzag machine made by the Speedmaster Sewing Machine Corp. in Holland. There is even less info on this machine. I couldn't find anything like it online. Actually, I can't find anything on either machine online.


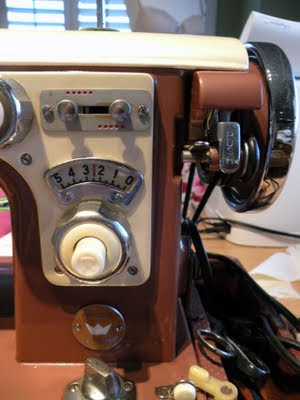

The first is a Model DST Deluxe Streamliner straight-stitch machine, made by Matsushita in Japan:


Here's the original manual. It does not even name the machine, the date, or anything about the manufacturer:


It even came with a universal darner:

The second machine is a Queen? zigzag machine made by the Speedmaster Sewing Machine Corp. in Holland. There is even less info on this machine. I couldn't find anything like it online. Actually, I can't find anything on either machine online.


Both machines work, just a little dirty and need some T.L.C. I haven't used either one since I got them! The Queen machine needs a new bobbin winder wheel because it is worn down and it doesn't make contact well with the balance wheel when you push down on the "PUSH" lever.
If ANYONE can give me some info on these machines it would be greatly appreciated. Any and all comments are welcome. I really would like to know what I have. Any resources you can point me toward? Does anyone have one of these machines or know how much the are worth?
Thanks Readers!
On a sewing note, I finished the dirdl and have a post 1/2 written. Just need the Boyfriend to take pictures! He'll be here tomorrow! Hooray! Also have a Sorbetto 1/2 sewn. Maybe I'll get it finished tomorrow and I can cut out the top of V1247.
Wednesday, June 22, 2011
The Happy Father's Day/Birthday Shirt!
I finished my dad's Hawaiian-style shirt yesterday, just in time for his trip to Hawaii. I'm not going this year....Staying home to babysit the dogs.
I used this pattern again:


Oops. Looks like my dad forgot to button the bottom button. I made the same fitting adjustments as I did with the first. I did not do the "burrito roll" method, but opted to follow the directions. I only got confused by one part, the first step of attaching the the yoke facing. The pictures were a little unclear, but I managed to put it together correctly. I just recommend reading very carefully.
My dad being a goof ball:

And showing his muscles (He didn't have time to flex...my camera battery died at the beginning of the photoshoot and we were rushed).

I am pleased with the shirt and I think my dad likes it too. I'm happy I followed the directions because hand-sewing the yoke facing was really relaxing.
My dirdl is almost done. Not loving, it but it was fast and really cheap! (Like $1.25 to make). I look too hippy in it, and I don't have any hips! I think I'm going to make myself something else before I start on my sister's Michael Starr knock-off tops again. They are boring. I want to make V1247. I already have the fabric for the top and skirt picked out.
I used this pattern again:

This time around I used a strange cotton fabric. I say strange because it is coarser than gauze, but wrinkles like it. The yarns are loosely woven and pretty thick, visible to the naked eye. It is printed with some unbleachable black pigment, which was really good news as I had some laundry issues with the fabric. When I bought it ($1/yd swapmeet find, of course) we also purchased some beautiful cotton sateens. I decided since they were all light in color, I would wash them together. BIG MISTAKE! One of the fabric pieces was cheap-o and bled its entire printed design onto everything else. My dad's shirt material had light blue splotches all over it. I washed it multiple times then decided to do a bleach test on a scrap of fabric. It worked, the fabric was washed again with bleach, and it came out all shiny and new! Very soft too!
I was really busy with the last few weeks of school so I did not have time to make the shirt before his birthday. Oh well, I had it finished a few days after Father's Day. Enough of my chatting...here's the shirt:

My dad being a goof ball:

And showing his muscles (He didn't have time to flex...my camera battery died at the beginning of the photoshoot and we were rushed).

I am pleased with the shirt and I think my dad likes it too. I'm happy I followed the directions because hand-sewing the yoke facing was really relaxing.
My dirdl is almost done. Not loving, it but it was fast and really cheap! (Like $1.25 to make). I look too hippy in it, and I don't have any hips! I think I'm going to make myself something else before I start on my sister's Michael Starr knock-off tops again. They are boring. I want to make V1247. I already have the fabric for the top and skirt picked out.
Subscribe to:
Posts (Atom)