Sunday, November 21, 2010

FINALLY! A little time to sew...

ie.  Homework Procrastination.

Sorry for not posting ANYTHING!  School has been kicking my ass. (Actually, I've been kicking its ass, but it's been taking up almost all of my time).  I finally gave in and sewed something and now I have something to post even though its completely lame.  

My mom bought doll clothes patterns for the American Girl Dolls.  She is giving a doll to my niece for Christmas.  Well, my mom started working on some of the clothes, and I decided to help. I stopped working on my Fashion Sketching homework to sew something for the first time weeks other than mini samples for my Industry Sewing Class.

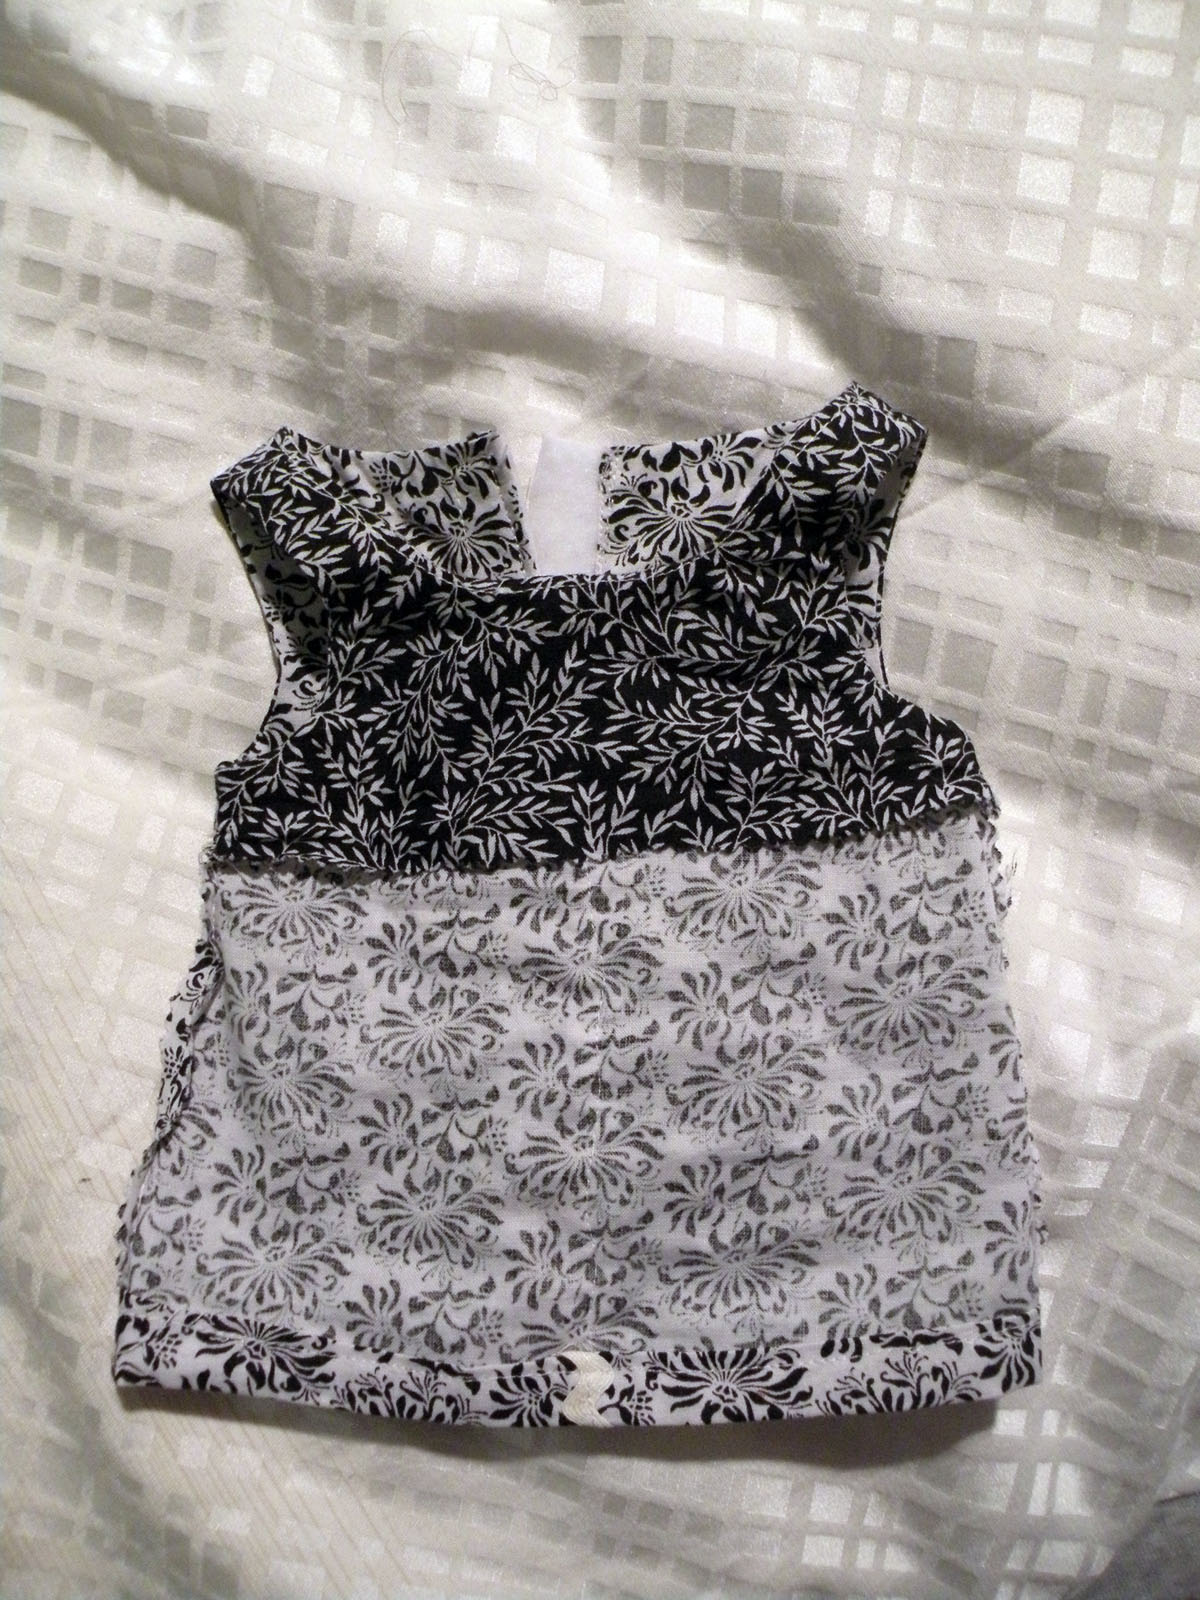
This is what we made:


I cut out the pattern, my mom made the p.j. bottoms and I made the top.  I did not really use the instructions for the construction.  I tried to treat the top as a mini version of a real pjs.  This way I got practice on not using instructions and clean finishing the seams.


My mom cut out the pattern for this cute little dress, started sewing it, and I finished it.  I was really unhappy with the instructions on this one so I took apart what my mom had started and treated the dress as a real garment.  The facing was inserted the way I would a real dress and everything was clean finished.  Because they are just doll clothes, I pinked some of the SAs and the bottom of the facing.  


The clothes just barely fit the American Girl dolls!  Maybe, we made the S.A.s a smidge too big.  That's the only thing I can think of.  The top fits great, the bottoms and dress are snug.  Any suggestions other than cutting the pattern a little bigger and using smaller S.As?

Here is the Pattern Review:


Pattern Description:

18" Doll Clothes including top, camisole, vest, skirt, pants, jumper

Pattern Sizing:

one size.

Did it look like the photo/drawing on the pattern envelope once you 
were done sewing with it?

Yes, for the most part.

Were the instructions easy to follow?

The instructions were awful.  Very confusing and made construction more difficult than it needed to be.  I wish the instructions were more like instructions for real clothing patterns.

What did you particularly like or dislike about the pattern?

Clothes were cute.  Many variations.  They were very snug on an American Girl Doll.  Almost couldn't get the jumper on the doll.  It would be very difficult for a child.

Fabric Used:

Cotton flannel for the pjs, quilting cotton and rick-rack for the jumper.
Velcro for the closure.

Pattern alterations or any design changes you made:

Nope.

Would you sew it again? Would you recommend it to others?

It's snug. Probably won't sew this pattern again unless I use smaller SAs or cut it out a little bigger.

Conclusion:

Instant gratification project.


And thank you Rachel and Penny Pinching Pixie for becoming my most recent Blogger followers!

(As I was typing that a little spider crawled up my arm! EEEWWWW!)

Sunday, November 7, 2010

CSN Giveaway winner!

Congrats to Pixie! Random.org has selected you.  You have won $35 to the CSN stores online!  I just need your email address so you can get your gift certificate code!


Please email me at rofishman [at] [gmail] [dot] [com]!


I will have my awesome zipper giveaway soon!  I still have to take pictures of my scarf.  I miss sewing so much! I do have an awesome tutorial in the works for pin-less curved seams.  They are easy!  You'll  never cry over sewing a Princess seam again.

Pearl loves the blow dryer. :)
Voting for Pearl's Halloween contest ends soon!

Tuesday, November 2, 2010

Vote for Pearl!


It's Election Day and its time for you to go to the polls at Pattern Review to vote for your favorite puppy in Blogland, Pearl.

Voting starts today and ends Novemeber 11th!

Oh, don't forget to vote in your state elections too :)

Saturday, October 30, 2010

CSN Stores Giveaway!

Hi Everyone!

I'm hosting my very first giveaway on my blog courtesy of CSN Stores. CSN is comprised of over 200 online stores, selling everything from dining room chairs to sewing equipment!  Don't worry, this post isn't really about dining room chairs and you don't have to purchase a chair with your $35 gift certificate from CSN!  But, you may want a new chair for your sewing studio. :)  WOo!  You can buy shoes! or awesome bedding! (my favorite) or pet supplies!  I actually bought one of Pearl's doggie beds at CSN well before I started to blog.  She loves it!  

So here is how this works:

Check out the site and leave a comment telling me what you plan to purchase by Sunday, November 7th at 7:00pm Pacific Time. Creativity counts! I love haikus and limericks.  Actually, I will use random.org to pick my winner, but think of something cool to write anyways!  I need something really entertaining to read in between working on homework assignments now-a-days!   I will also give you another entry if you link to this post!  Just comment again telling me you linked and you will have, count 'em, TWO entries!  YAY!  

Sorry super international folks...I'm pretty sure this is only for US and Canadian residents :(    Also I have been informed that there may be international shipping charges in the case of Canadian addresses.

I will pick the winner of the $35 gift certificate next Sunday night!  Good luck and please keep me entertained!  

(PS. I have not forgotten about the zipper giveaway...there will be one. I promise!)


Thanks Jo Ellen for becoming my newest Follower!  Don't forget to enter for your chance at $35 smack-a-roos!

Doesn't Pearl look like a Bobblehead? 


Thanks everyone and good luck!

There's no place like home....

Last year I was determined to make my Halloween costume.  I have always wanted to be Dorothy from the Wizard of Oz, but found RTW costumes either very frumpy or overly slutty.  I wanted to be tastefully naughty :)  I'm still young, and it is Halloween after all.

So here I am in my costume:


It was a first for working with slippery fabrics, lining, grommets, and using boning.  I used the crappy Joann's boning, something I will never do again.  I think it turned out pretty well for a crappy Halloween costume.  The shirt is RTW and the shoes are kid's shoes from Target.  I have tiny feet :)  

The silly thigh-highs were so ridiculously expensive from one of those seasonal Halloween Headquarters stores.  I liked the cute blue bows though.  


I also made the Boyfriend a costume.  He went as an octopus.  I actually like this picture of him, but he doesn't.  That's why is face is blocked out.  

Here's the PR for my Dorothy costume:

Pattern Description: 

Misses' wizard of oz costumes - Dorothy, scarecrow, Glinda and the wicked witch costume patterns. I made the Dorothy pattern.

Pattern Sizing:

8-16. I made an 8 in the corset/vest and a 10 in the skirt.

Did it look like the photo/drawing on the pattern envelope once you were done sewing with it?

For the most part.

Were the instructions easy to follow?

For my first corset and first lined vest and skirt, yes. They were.

What did you particularly like or dislike about the pattern?

The pattern was drafted okay. Not great. Because it was a costume, it did not go into the correct way to insert the boning. I didn't care because the costume was worn once. I hate the plastic boning with channels. It was a pain in the butt.

Fabric Used:

A shiny poly gingham from Joanns and rayon lining fabric.

Pattern alterations or any design changes you made:

I had to let out the skirt a bit for comfort. Maybe should have made a 12. I also serged the bottom hem for ease. I made it over a year ago so I can't remember all the changes. Nothing drastic though.

Would you sew it again? Would you recommend it to others?

No. I would recommend using other patterns to achieve the same look.

Conclusion: 

The costume was fun. I was happy with it when I made it for last Halloween and maybe I'll wear it again.


And don't forget to vote for Pearl for the PR costume contest starting in November.  I'll remind you all and send a link when the voting starts :)  


Saturday, October 23, 2010

Grrr! Roarr! Simplicity 2839

Happy Halloween (almost)!  I finished Pearl's Halloween costume about a week ago and finally got around to taking pictures! Here she is:


Isn't she the most ferocious lion you have ever seen!?  

More pictures!  


The lion has spotted her prey...


And if Pearl isn't a good enough model, here is Fritz!


 Did you know lions climbed trees?


The back hem detail:


I'm entering this costume into the Pattern Review contest so please vote for me :)


Here is the Pattern Review:

Pattern Description: 

Dog costumes in 3 sizes: Elvis, Bumblebee, Cow, Lion

Pattern Sizing:

S - M- L . I started with a small and shrunk it down to 60% on a xerox.

Did it look like the photo/drawing on the pattern envelope once you were done sewing with it?
More or less. After I shrunk it down, it ended up being a smidge too small so I lopped of the back legs and made it a shirt. I also omitted the tail because my dog's tail is cuter. :)

Were the instructions easy to follow?

Very easy

What did you particularly like or dislike about the pattern?
Their small is not really small. It will fit a fat chihuahua or a larger pug. Not my 4.5lb yorkies.

Fabric Used:

Golden polar fleece remnant from Joann's and brown faux fur.

Pattern alterations or any design changes you made:

I shrunk the pattern down to 60% of the original and added back 1/2" seam allowances. It didn't quite fit so I made it a shirt instead of a jumper. I also lined the hood with polar fleece to make it more comfy for the dogs. The fur was really scratchy on the underside. I used the same pattern pieces to make the lining, just did not attach ears to the lining. I serged the entire outfit and used a twin needle for all the hems. I omitted the tail. 

Would you sew it again? Would you recommend it to others? 

I would like to make it a bit bigger for next Halloween, maybe in the cow print for my dogs. Or make another one for my mom's yorkie. Both dogs hate hoods though. 

Conclusion: 

Sizing was a little weird, but the pattern is cute!


Pearl's pouty face.  (She's begging for a vote!)


Wednesday, October 20, 2010

A cool thing I learned at FIDM...ie. Industry Secrets!

No tutorial pictures...Sorry. I just don't think you need them. (If you do though, I'll post some).

 I learned something really simple, and I might even say life-changing in my sewing class at FIDM.  It was sort of a "duh" moment. You know, the "Why didn't I think of that?" portion of class.

My instructor told us that when backstitching, instead of stitching from the top 1/4in., then reversing 1/4in., and then continuing forward with the seam, we should start 1/4in. from the top, reverse to the end and then continue forward.  This way:

1) It is faster and more efficient
2) It has practically the same locking effect as the "forward, backward, forward" method
3) It is easier to pick out if necessary
4) It actually creates a lot less bulk in the seam

At the end of a seam, go all the way to the end and just reverse 1/4in.  You do not need to stitch forward to the end.

I hope this made sense.

Cool, huh?


Also...

Thanks to Angie and Alethia for becoming my most recent followers!  A special thanks to Alethia for her comment on using an industrial machine.  I have been practicing and it is not as hard as it had been.  I appreciate the encouragement (and now I want an industrial machine of my own!)

I think it's time to bust out this gem of a picture.
Yes, Pearl is SEW CUTE!