Showing posts with label Pearl. Show all posts

Thursday, June 26, 2014

Annie's Edna


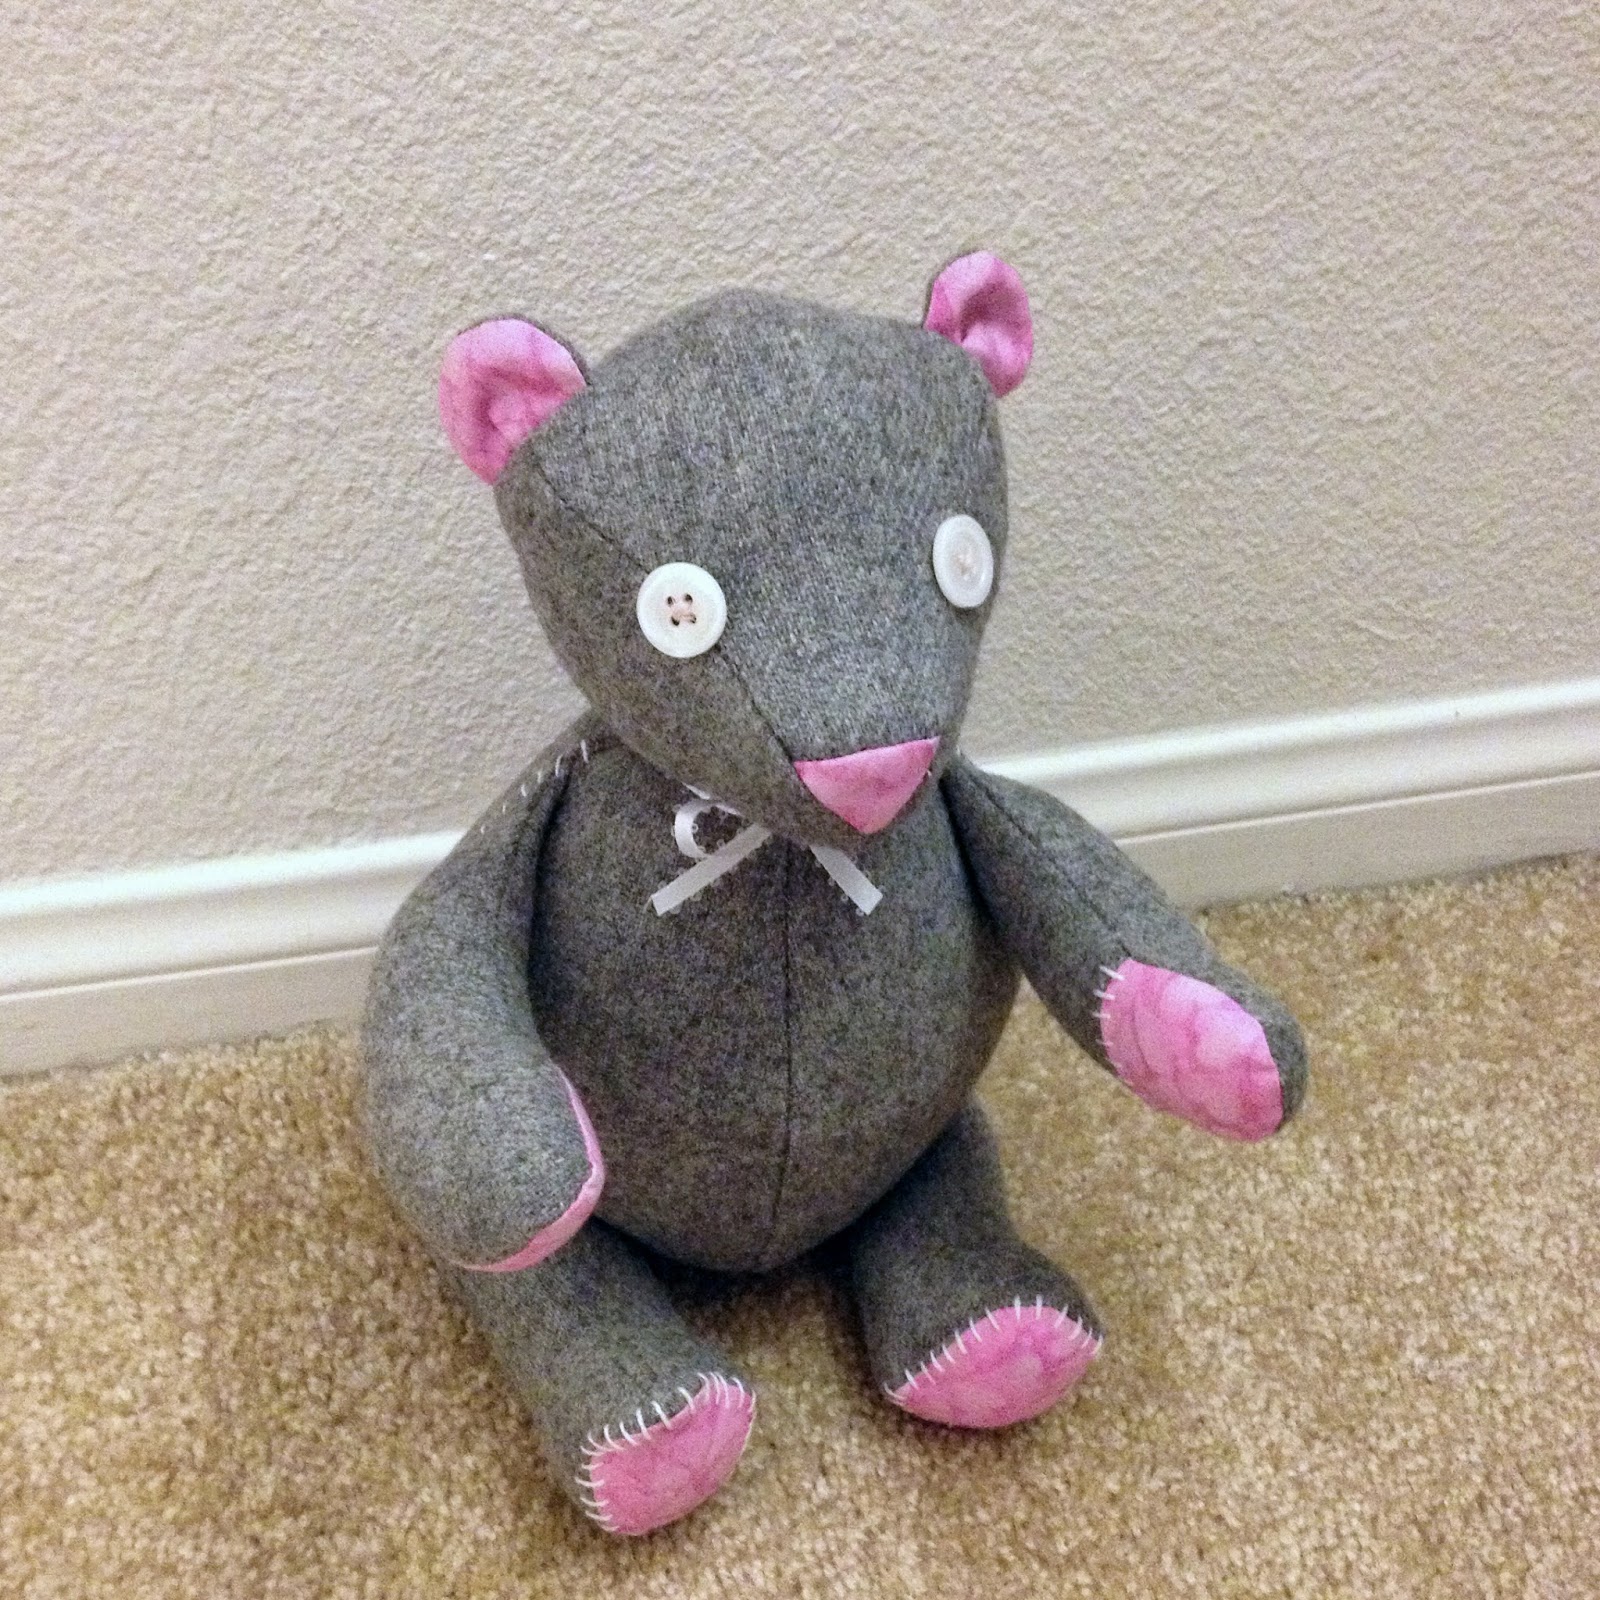
One of the Boyfriend's good friends had an adorable baby girl and he wanted to do something special for her.  We decided to make a teddy bear.  The Boyfriend helped select the fabrics and I pretty much did the rest. :-P  Oh, The Boyfriend also helped stuff the various bear parts.


We used the Purl Bee Teddy Bear pattern and tutorial.  The pattern was drafted well and the instructions were good.  I think a beginner could make this. Certain sections were quite difficult like the muzzle area and lower leg paws, but doable if done slowly.

 I wasn't happy with how the paws turned out initially.  They are uneven and a little wonky.  To fix camouflage the problem (or make it stand out more?) I did some purposefully uneven, but charming hand embroidery.  Well, I say charming; others may say shitty. Hehehe.  The arms were stitched to force them forward as they kept flailing backward.

Here are few views of the hand stitching:


Overall, I'm pleased with how the bear turned out and named her Edna.  She's a little weird and I thought she needed an odd, old-fashioned name.  Annie can re-name her when she's old enough to talk.

Edna's Tail!


For scale, here's Pearl modeling with Edna.  Pearl is 3.5 lbs.


Saturday, April 12, 2014

Minty Spring Dress

A few weeks ago I made a dress, but I just finally got around to writing about it.


I used M6754, and combined view C and D.

The dress does not have a zipper.  The waist is stabilized, which makes it a little tricky, but once it's over my chest and shoulders, it's quite comfortable.

Fabric is a poly/lycra double knit I got for $1.50/yd at the swapmeet.  I first wore this dress out in Palm Desert, CA and it was surprisingly cool in spite of the polyester.

So, I'm pretty happy with how it turned out except that I should have done a small FBA.  The front of the waist seam pulls up a little.  The seam is not at my true waist which makes wearing a skinny belt a problem.  Belts don't quite sit at the waist seam and droop down especially at the CF.  If I use this pattern again, I will adjust the seam.  Lastly, the neckline hem is a little wonky over the thick seams, but looks as good as RTW in my opinion.


These pics were taken in my apartment complex.  The Boyfriend was a sport.  So was Pearl.  :)

Full Review on PR.

Sunday, March 2, 2014

More Silhouette Fun.

I made my mom a silhouette portrait of my parents for Mother's Day.  I finally got around to taking the picture off my camera.


I photoshopped photos of them, merged the images together, and converted the file into Illustrator. The Silhouette Studio program will take .ai files, but not .jpgs.  I traced the file and with some trial and error, made the portrait.  I used some Amy Butler scrapbook paper for the background and created my own photo mat too.  


I took this picture of Pearl on the same day.  Yes, a gratuitous portrait of Pearl :)

Monday, February 17, 2014

Fun Times with the Silhouette!

I mentioned a while back that The Boyfriend bought me the Silhouette for my birthday in 2013.  Here is one of the projects I made with it.

The first actual project I made with the machine was a silhouette portrait (how appropriate, no?) of the Boyfriend and Abraham Lincoln.  I was inspired by the portraits made at Disneyland.  If you didn't know, there are cast members in this one shop on Main Street who hand-cut your portrait in a matter of minutes.  It's novel, but not cheap.  One of the examples on the wall of the store is of Abe.  We were initially going to pay for a portrait with The Boyfriend and Lincoln, but I though it would be more challenging and fun to do it myself.  I know, it's weird, but that's how I roll.

 I used my mad photoshop skills to turn the Boyfriend's profile image into a black silhouette.  I combined that image with a rad clipart file of Honest Abe.  Working in the Silhouette software is not easy.  I'm so used to Photoshop and Illustrator that the software doesn't make sense to me.  And there aren't great instructions out there.  So many tutorials, but a lot of work to watch and try to apply to my own projects.  I'm much more into designing my own things, than downloading from the Silhouette Store.   Here it is:

I surprised the Boyfriend with this on his birthday.  

Not wanting to waste paper, I also decided it would be cute to get a portrait of Pearl.  It was a bit of a challenge to get Pearl to sit still long enough to snap a photo of her from the side. 


 I snapped this picture with my iPhone in my left hand and a treat held up high in my right hand.  

She's such a sport....

(Both frames were found at an Antique Flea Market.  The Boyfriend's frame was $2 and the bow frame was only $1!!!)

Monday, February 3, 2014

Baby Quilt for Jack!

Going to try to get back into blogging again.  I've made quite a few things since the last time I blogged, but haven't taken many pictures.  Made myself a couple of tops, a button down shirt for my dad, a quilt (see below), pillows for my house, blanket pants (super warm and fuzzy pjs) for the Boyfriend's brother-in-law, and most recently a sweatsuit for my baby nephew.  I think I realize that I don't blog if I get held up with photographing a project.  I made my mom a beautiful pencil skirt last year and I still don't have pictures of it.  I have a hard time moving on, if I don't "complete" a project.  You won't see many UFOs in this house.  I've had a crap project or 2 which I won't go into because they make me sad. I hate sewing projects that don't pan out.  I've also been focusing on more craft projects for the house, rather than sewing all the time.  I work with clothes on a daily basis at work and going home and doing the same is too much sometimes.  

Well enough of the excuses.  Here's the quilt!


My sister had her first baby in October.  For the shower in August (yes I made this so long ago!!!) I made a baby quilt.  I had so many ideas to choose from thanks to Pinterest, but I landed on this triangle quilt.  I'm pretty happy how it turned out.  The binding could have been better, but my sister seems to like it. 

I used Kona Cottons for all the solid colors, which I purchased at Fabric.com.  The mini triangle fabric was also purchased at Fabric.com.  I bought the grey chevron fabric at a local discount fabric store.  

The quilt took a few days to make.  The Boyfriend helped with some of the sewing :) and the placement of triangles.  

I also made a little matching pillow with extra triangles and bunting to hang in the baby room. 


I stole this picture from my sister's facebook page.  The quilt and pillow are on the chair.  


For size reference, here is the quilt occupied by Pearl.  If I put anything on the floor, Pearl jumps right on.

I'll try to jump back on the blogging band-wagon.  If I don't, please forgive me.  :)


Sunday, June 30, 2013

Just What I Needed...Floral Tank: Simplicity 1693


I needed an quick project.  An easy one to cleanse my palate of the Boyfriend's shirt.  I went through my patterns and chose Simplicity 1693.  Then I went through my stash and found a rayon challis strike-off I got at the swapmeet.  I got 2 yards for $2.  Woohoo!  I originally thought I would make a dress using this fabric, but never paired it with the right pattern.

I chose view F.  I used french seams throughout and made my own self bias binding to finish the neckline and the armholes.  Without the collar, the top was sort of boring.  I decided to make spaghetti like I did for one of my first projects in school.   The spaghetti straps could have been stuffed a little more, but I think they are alright.  I hand-sewed the spaghetti straps in a swirly pattern and added pearl buttons.  Here is a close-up of the neckline:


 The instructions had you make a button loop with thread.  Mine's slightly too big for the button so it slips off the button sometimes.  And the close-up of the back:


If I make this view again, I might try the collar and I would shorten the back a little.  It is quite long on little ol' me.  I definitely want to try the other views.


Thanks to my newest followers!  190!  Woohoo!

Cat
Susan Partlan

Giveaway next time :)


Follow on Bloglovin


Friday, January 11, 2013

Should I even keep blogging???

I've decided that I suck at blogging.  I'm sorry readers, but since college I haven't had to write much and my skills have deteriorated.  I thought blogging would help, but it did not. I thought I would enjoy making tutorials and sharing new information that I learned in school and at work.  Tutorial writing is a pain in the ass!  Those of you who do it know how tedious it is and I think you are AMAZING for creating them.    I'm also just not motivated to write anymore.  I do like tracking my projects, but it is very hard when I wait so long to post.  

I think I'm going to keep the blog going for a while longer.  Any thoughts or suggestions?

Just because...
Despite my absence from the blogosphere, I have 6 new Followers:

Hot Mess Heifer
BigChoc
Jenny
Kat Campbell
Kathy of Kathy Sews:  She made some cute dresses and has a giveaway going on!
elianeBatalha

Thanks Ladies!


Thursday, November 1, 2012

Peplum Top Pattern Adjustment Tutorial

I promised a picture of the New Look 6130 peplum top facing pattern I redrafted and here it is:


Front facing.

Back facing.
The idea of having a neckline facing and an armsyce facing flapping around inside the shirt was gross to me, so using the main body pattern pieces I drafted my own facing and I think it worked pretty great. 

Here's how I did it:
  1. First, draw on the sew lines on your pattern pieces.  In commercial patterns, this is usually 5/8."  I, however, changed all my seam allowances before I cut the pattern so my seam allowances were 1/2" for most seams, and 1/4" along the neckline and armsyce.  I also left a 5/8" SA at CB where I was inserting the zipper.  
  2. Match up your sew lines on the front bodice pieces.  See my pattern below.  Can you see how the armhole matches up perfectly on the CF and SF bodice pieces?
  3.  Place a piece of tracing paper over the pattern and pin/tape down. 
  4. Your front facing should be  2-2.5" wide at the CF neck and 2-2.5" down from the bottom of the armhole, depending on how you will finish your edges. This is 2-2.5" from the sew line, not the cut line.  
  5. Make sure your facing is square (at a right angle to) the CF vertical line.  At the sides seam, square a line the distance down from the armhole that you decided upon. 
  6. Trace the shape  up the armhole 2-2.5" from the armhole, until you get to where an armhole notch might be.  That is where the shape starts to get a little wonky.  (the dashed lines curving around the armhole are 2.5" away from the cut line)
  7. Use a french curve and/or a hip curve to connect the two lines (one starting from CF, one from the bottom of the armscye).  The shape should look smooth and natural.  See how it didn't on the back facing and I corrected it.  
  8. At the sideseam,  mark 1/8" in at the bottom of the facing. From that 1/8" mark to zero at the underarm, draw a line.  This will be done on both front and back.  this small removal of fabric tightens up the facing a bit and prevents it from creeping out of the bodice.  
  9. On the back, I did everything above, except the facing is wider (or longer?) at CB.  I like (and was taught) to make wider facings in back.  4 inches is a good length down from the neck on this pattern.  The back neck drop is fairly shallow, so this will work well and it won't be too deep.  Basically you don't want the facing overlapping your scapula bone (your chicken wing!).  Just like you don't want a tight facing going over your boobage!  
  10.  One thing I forgot to do, but do it all the time was to decrease the shoulder width on both sides by about 1/16 - 1/8" depending on fabric thickness.  What you will do is mark both sides of the shoulder seam (on front and back facing) and blend to zero to about 2/3 the way to CF and 2/3" down the armhole, whatever blends naturally.  It's easy to see once you are doing it.  

the first step.  
That's it!


Let me know what you think!


Thanks to my newest followers!

scherimm
Becky Ensinger
Nina
Angie Newell

180! That's Amazing!

Here's a fun picture of Pearl:

Pearl modeling Fritz's Halloween costume...A Giant bath sponge!!! Yup, I made this one too in about an hour for $3.00.

HAHAHAHA!

Monday, October 29, 2012

It's Halloween Time! Ch-Ch-Ch...

CHIA!

When I was a kid, I loved Halloween.  As an adult, I'm not a huge fan of it.   But I do like dressing up my dogs in ridiculous costumes every year.  This year is the best by far.  I would like to introduce you to the newest knick-knack to adorn my bookshelf:

Ch-Ch-Ch-CHIA PEARL! *

It's like playing "Where's Waldo?"
Here's how I started:


A long time ago I drafted a onesie pattern from an existing dog outfit.  I made onesies before here and here. I redrafted the pattern this time, making it a little more professional.  My sewing has greatly improved since the last time I made Pearl's onesie so the construction method changed.  It went together fairly quickly and the fit is a lot better than before.

Here she is before her pjs became Chia-fied....


Pre-haircut...
 I then took apart fake hydrangeas I bought at Michaels and glued the individual buds to the base.  This process too two nights.  I used a stuffed animal roughly the size of Pearl to make it easier to glue the flowers. The glue and the flowers formed a hard shell.  I was not expecting this, but the outfit still fits the dog.

 I  couldn't resist placing her on the bedside table. She looks just like the real deal.  I wish I had video of her scurrying around on the floor as a chia pet.  It's almost eerie because at first glance it looks like  ceramic dog


And lastly, a close-up of Pearl.  I couldn't resist.  Her face is so cute in this picture.


I'm entering Pearl in the Pattern Review contest again this year.  Vote for her!


*Coming to a Walmart near you.

Wednesday, July 25, 2012

Flea Market Tote


One of the other projects I started a long time ago from the Heather Ross book was the "Everything Tote." I used Echino fabric I purchased on sale at the Purl Soho warehouse in Tustin.  It has owls and deer on it!!!!  I was so excited to make this new bag, but it was nothing but trouble!  The instructions were atrocious and if you follow them, the handles turn out to be tiny and nothing like the picture.  The amount of fabric needed is incorrect as well.  The pattern calls for 1/2yd of the self and lining fabrics, but I think you need 1.25yd each.


What I did differently:

* Pleated instead of gathered the bag front and back
* Used a completely different handle treatment.  The instructions did not make sense and there are many other ways to get the same look.
* I added buttons on either side and used a hair-tie as a quick closure.


* While cutting out the lining pieces, I accidentally cut into my fabric TWICE.  This allowed me to practice my corner seam technique.  They came out beautifully. :-P


One the plus side, this bag holds a whole lot and because I used an off-white lining, it is very easy to see and access all my "stuff."  It's a great flea market bag!

Also, it can carry an assortment of dogs.


It turned out cute, but I would not recommend this pattern.

Saturday, April 14, 2012

Worst Blogger: Follow up to "Bad Blogger"

Sorry everyone! I suck at life, and blogging apparently.  School's over! I'm a graduate...again.  I've been piddling around for almost a month now trying to recuperate and psych myself up enough to sew for myself and look for jobs.  I absolutely hate looking for a new job.  It's quite scary, isn't it?  I'm almost ready to jump in head first!

Thanks to all of you who stuck by the blog even when I was absent.  And all the new followers!  I haven't forgotten you either!

Thanks to:

Denise
Chrissy
Sarah and her singing chihuahua
Andrea670
Julie
Debi from My Happy Sewing Place...Love the Marlene suit!!
RebThack


I'm still reading blogs, but rarely commenting.  So sorry.

I sewed many gifts for xmas, one of which, a long sleeve, button-down shirt for my dad, I just finished.  Hahaha! Thanks FIDM for giving me no time to work on presents for my family until after term.  :-/

So I have xmas presents to blog about, the shirt, and the 1969 skirt I just made and have to post on Pattern Review for the contest.  The skirt will be first.

Pearl misses you guys too!


Pearl really enjoys reading...

Thursday, October 13, 2011

The FIDM adventure begins...again...

Thanks for all the coat comments.  The weather heated up and I haven't even had a chance to wear it.  It's too darn hot!  Tomorrow it is supposed to be almost 100 degrees.  All my new Fall/Winter clothes are sitting lonely in my closet.

School started again last week and I'm already pooped.  This is my second to last quarter, but I wish it was my last.  Most of the other Professional Designation students are done this quarter, but I chose to take it easy and take 4 classes/quarter instead of 5.  Oh well, at least I get to use the Trend forecasts and the free printing a little longer.

This quarter I'm taking Creative Design Analysis and Collection Development.  This class is basically the same as my other class Creative Design Applications last quarter, but with fewer projects, more tech packs, line sheets, and cost sheets.  I also get to use the computer instead of hand draw all my technical flats.  We only have 2 assignments all quarter, a 12 piece group for a brand, and a 36 piece collection for our own hypothetical line.  This week we broke into groups and decided on a brand that we would design for.  My group chose Kate Spade (Hooray! It was my first choice).  We each have to design a 12 piece group for Kate Spade based on a common theme.  I'm kind of excited about this one, but the work won't be all that much fun.  The teacher seems nice and informative, but she is very, very repetitive.  I've already had 2 classes and she has told the same story about 6 times.  Its going to be a very long quarter.

I'm also taking Computer Pattern Drafting I.  In that class we use the Gerber software to draft patterns.  So far it is too easy.  I really want to be challenged, but when I finished the cuff in about 5 minutes (the first time) I asked my instructor what to do next and he said do it again.  The next time it took 1 minute.  Yes, it is a rectangle, but still some students couldn't figure out the program.  The great thing about class is that there is NO HOMEWORK!  Just minor studying for quizzes and midterms.

My last class is the Red Dress Special Project.  I applied and found out about my acceptance at the end of last quarter.  I get to design, pattern, and construct a dress from exquisite (hopefully) fabrics and then the dress gets donated to the American Heart Association.  I was unaware about the donation part.  I understand it is for charity, but so far in the last 5-7 years (I'm not sure) the dresses from the class have been sitting in an awful storage facility or the office of the head of the Fashion Dept.  It is one thing to auction them off, its another thing to hoard them.  If they aren't going to do anything with the dress, I'm going to want it back.  I'm paying for it.  Rant ended....
So far the class is going well. I'm not loving my group.  We all have different design aesthetics.  They obviously don't like my aesthetic, and I really don't like some of theirs.  I was nice though, unlike some people in my group.  Ugg, another 9 weeks.  I'm going to make what I want, even if my group doesn't like my designs.

This quarter, I received very few new supplies.  No new textbooks.  It makes me leery about how they calculated the $5000 supply fee....I'm going to ask about that this quarter for sure.

Once my Amazon Widget starts working again, I 'm going to post my previous textbooks that I like and highly recommend.

And Finally thanks to my newest followers!

Mellacita, Scared Stitchless, Carol, Sunitha, and Doobee64.

Baby Pearl almost 4 yrs ago in a crocheted dress I made for her.

Wednesday, October 5, 2011

My First Fall Project: M5525 Purple Pea Coat

Hooray!  I finished my coat yesterday, a day before school started!  Yes, FIDM classes have started again.  Boo hoo.


I didn't take pictures as I went along because there are so many great step-by-step pictures  on the web on how to make a coat and I am no expert.  This was my first, and I'm pretty proud of it.  There were a few minor hiccups along the way.


I really wanted to make a ton of things on my break,  but only managed to make my sister a knit t-shirt for her birthday last June ( forgot to take pictures of her in it) and hemmed a pair of The Boyfriend's jeans.  And the coat of course.  I still owe my sister a dress and have to hem more pants.

Including the 2 muslins, the coat took about a week.  I didn't work on it every day and I took FOR-E-VER cutting out the coat.  That took a couple of days.  Then I sewed the lining in a night.  It took 2 more days to put together the coat.  Last night I finished the coat by making self-fabric covered buttons using vintage button kits, buttonholes and sewing on the buttons.

The Boyfriend took pictures today, but I CAN'T FIND THE CORD THAT TRANSFERS PICTURES FROM MY CAMERA TO MY COMPUTER.  It disappeared like yesterday!  UGG.  So I can't show you pictures just yet!


I'm really bummed out, but when I find the cord I'll post ASAP.

Sorry for the picture-less post.  


Thanks to Nicole A for becoming my newest Blogger Follower.  Her blog is here. :)


Pearl in Pants!

Sunday, October 2, 2011

Pattern Review Costume Contest!

Hi Everyone!  I entered Fritzy in the PR costume contest this year!  He's the little leopard dog!  Vote for him if you are a member of PR!  You can vote here!


Thanks!


Coat Update:


My purple coat (M5525) is almost done!  I'm hand sewing in the should pads right now and then I have to insert the lining (which is already sewn).  Once the lining is in, its hand sewing the hem, making buttonholes and sewing on buttons.  I still haven't found the right buttons.  I  hope I do soon!

Sunday, September 25, 2011

Welcome to the Jungle...

Remember the Halloween costume I made for Pearl last year?


Well, this year for the Pattern Review Costume Contest, I made little Fritz a LEOPARD OUTFIT!

 In "captivity."

In the "wild."

On the prowl.

Scavenging for food?

Lions and Leopards and...


 Roxy...oh my!...

Pearl got second place last year, this year Fritz should take 1st!  Vote for our cute little leopard dog cat thing.  

The pattern Review:

Pattern Description: 

Dog costumes in 3 sizes: Elvis, Bumblebee, Cow, Lion
Pattern Sizing:

S - M- L . I started with a small and shrunk it down to 60% on a xerox. Because I made the pattern before, I increased the size of the pattern by slashing and spreading (which worked, to an extent).
Did it look like the photo/drawing on the pattern envelope once you were done sewing with it?

More or less. After I shrunk it down, and the graded the pattern up a bit, it ended up still being too small. I made this version a shirt as well and did not include the tail. I decided the problem with the fit was in the back legs. Maybe it was in reducing the pattern on the copier that did it, but the back legs are drafted poorly. There needed to be even more ease between the my dog's rear and his leg.
Were the instructions easy to follow?

I did not use them, but they seemed okay.
What did you particularly like or dislike about the pattern?

I think the pattern is cute, but not drafted well. I thought it was me the first time around, but I am more experienced now and I think it is the pattern. I wish the pattern companies made patterns for tiny dogs :)
Fabric Used:

Leopard print polar fleece from the swapmeet.
Pattern alterations or any design changes you made:

I shrunk the pattern down to 60% of the original and added back 1/2" seam allowances. I then slashed and spread and added an inch to the circumference about an inch to the length and split the legs open a bit for some more room. It still didn't fit in the back so I made it a shirt instead of a jumper.
Would you sew it again? Would you recommend it to others?

Nope! I think I'll just use my self drafted dog pj pattern the next time I make a doggie onesie. I'll probably use the hood pattern piece and the ears again though.
Conclusion: 

Try something else if you have little dogs. It may work for larger breeds.