Sunday, April 17, 2011

The Humble Beginnings of a Sloper

I finally have been inspired to draft a sloper.  For those of you who do not know, a sloper is a basic pattern block of 5 pieces (front bodice, back bodice, front skirt, back skirt, and sleeve) without seam allowances.  From this perfect shell of your body, you can draft ANYTHING! I love my pattern drafting class and I thought, "What better way to practice than to draft my very own sloper."  The back of my book, Patternmaking for Fashion Design (5th Edition), has a personal measurement chart to fill in with every possible measurement!

I followed the directions from the book and started by drawing CF and CB lines down a tight fitting tank top and leggings.  I added bust points and a piece of elastic around my natural waist as a guide.  I had help drawing dots and lines on my neck, back, and shoulders to complete my human dressform look.  My helper measured anything I couldn't measure myself.  39 measurement points with some having 2-4 different measurements.  It took a while, but we just finished.  I'm excited to start by drafting a basic skirt.  I've already done it for class twice and it is very quick and easy.  If I can get it to fit soon, I'm going work on drafting a high-waisted pencil skirt as my first real project! In between my classes, homework, and a possible internship....you know, when I have time...HAHAHA!

To prove that I drew on myself with an emerald green marker:

I photoshopped out the bust point X's.  It looked too pornographic for blog post.


Just a few more followers until my vintage pattern giveaway!  Yesterday we bought 2 huge boxes of older patterns (one box was a dud though) with 60's, 70's, and 80's patterns.  I'll pick some of the nice ones from there and from another stash of patterns we bought a while ago.

Maybe it will coincide with my 1st Blogoversary on April 23rd!

Sunday, April 10, 2011

My Amazing Friend's Amazing Weaving

My Craft Center friend (and first sewing teacher) made me this gorgeous wool/mercerized cotton scarf over the last several months.  Isn't it beautiful?  She dyed the wool and I think she spun it as well. (I could be mistaken about the spinning) Then she hand wove it on a horizontal loom.   Geez.... hours and hours went into this project and I feel so lucky and grateful to be the owner!  


Check out that intricate design.  She said the warp threads are mercerized cotton and the weft is wool and some mercerized cotton.  

I tried hand weaving years and years ago, but I hated it! I did not like the instructor and she forced the class to make a gamp or a "fabric that tells us what happens when different colors, weave structures, or types of thread intersect," instead of working on a real project.  Well, because the gamp took too long, I never had time to make anything cool or pretty.  

 I will probably wear it somewhat like this.  Maybe with a pretty pin:

 Here's another view of it!

Thanks V!

Saturday, April 9, 2011

New Sewing Books? Suggestions?

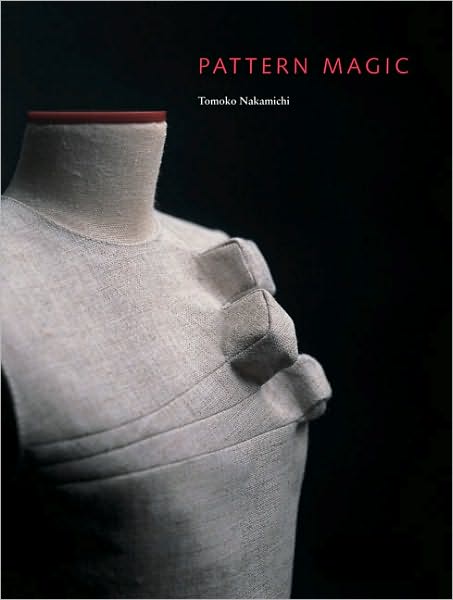
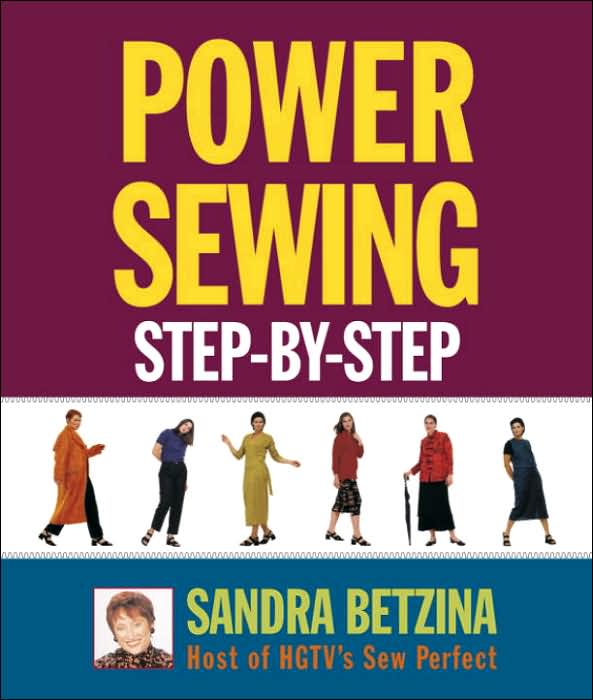
I received a Barnes and Noble gift card for Xmas this year and decided to finally spend it on sewing/pattern books.  I was thinking about getting these books:


9897163.jpg


I'm actually trying to decide between the Shaeffer and the Betzina books.  I know they are different and I want to get the most bang for my buck.  You know what I mean? Also, is there a better Shirtmaking book?   I'm definitely getting the Pattern Magic book though.  I've been all giddy about pattern drafting since my first class yesterday.  

Any other suggestions would be AWESOME too.  :)

And as always, a thanks to my new followers:  Shadow and Call Me Su!

Thanks!

Yea...we cuddle. No, she's not suffocating.


Friday, April 8, 2011

FIDM: Quarter 3 Begins

Hi Everyone! Thanks for all the lovely comments on the dress so far!  I'm definitely going to make other versions of it.

I forgot to show you this:

This is what I came home to (the Boyfriend's house) after my 7 hr drive in the pouring rain up to Northern California.  The Boyfriend set this all up before he went to work (minus the Pearl) so when I arrived I had the rose petals, the love note, a movie, the chocolate, flowers, drinks, and other snacks waiting for me.  He even bought Pearl Beggin' Strips!  I'm so lucky! 

Anyways....

Yesterday I had my first class of the quarter: Textile Science!  I loved it!  I feel like I'm actually back in college.  I actually had to take copious notes.   My instructor, Deborah Young, is a great lecturer and she wrote our Swatch Reference Guide book.  The book is very thorough and has helped me already identify fabrics.  There are 200 fabric swatches you have to assemble in the book, but they are all very good quality and so informative.  I highly recommend this reference guide!
Swatch Reference Guide for Fashion Fabrics


In class we also received another textbook.  I haven't really gone through it all that much, but its more scientific than the Swatch Reference:  J.J. Pizzuto's Fabric Science 9th edition


Today I had my first ever pattern drafting class. We drafted a basic skirt block from the measurements of the dressform.  I am sooo excited for prospects of pattern drafting.  Thankfully it is coming very naturally to me.  All you need in the beginning to draft slopers is to follow the directions.  We are using Patternmaking for Fashion Design (5th Edition) by Helen Joseph Armstrong.  I think the book is great, even though I found a few typos already.  Maybe older versions are better.  This book is great because it not only teaches how to draft for industry, but also for individual people (ie. YOU....and most importantly ME!)  I have these pants I designed for my final in Fashion Sketching II that I am dying to make.  I'm definitely going to draft them one of these days!  Do you want to see my sketch?

A brief summary next week on my Computer Grading, Marking, and Cutting class, and Computer Aided Fashion design.

Thursday, April 7, 2011

McCall's 5753 V-Neck Dress

While I was on vacation in Northern California, I spent 3 days at the UC Davis Craft Center. I visited with friends and worked on the dress (now OOP).  I'm so happy that I got to see friends, but it definitely slowed down the construction.  Of course I brought way too much to accomplish, and only finished the dress.  Here it is:
My styling is horrible(shoe choice).  I had a limited selection as I was on vacation.
 I'm relatively happy with the results.  (I'm such a perfectionist so when things don't line up absolutely perfectly, I get a little annoyed).  This is the first fitted dress of a woven material that I made!  I tend to make and wear knits because I have a hard time fitting wovens on my body.  The fabric is a cotton/spandex sateen ($1/yd. woohoo!) and the dress is fully lined with bemberg rayon (the instructions call for lining the bodice only).  The dress lining is a first for me as well.  I didn't use the directions, but used the Slapdash Sewist's tutorial.  I already knew the basics of lining, but needed a quick reminder on which seams to leave open.  The problem I found with this method was that it is difficult to fit.  The side seams are sewn after the lining is installed.  Even though I made a muslin that fit, for some reason, after I sewed the side seams, the dress was too big. I had to completely unpick it and take it in.  I took a total of 2 inches from the underarm seam tapering to nothing at the fullest part of my hip so I still have a "1/2inch pinch" of ease that the fullest part.   All of the other adjustments are here.
The front.

The back.
I decided to handpick the zipper (another first for me!). I didn't find it difficult, but I got lazy because I was chatting with friends and decided I didn't need to baste the zipper in first. I only pinned it.  This caused the zipper to pull a little in certain areas and you can see the zipper teeth :( No one really should notice this though because of the print and the zipper doesn't really look bad.  I also hand stitched the lining to the zipper to finish and blind catch-stitched the hem.


 On my vacation I also went skiing in Tahoe(weeee), and went to the Alameda Flea Market.  I bought NOTHING :( except a falafel and the yummiest mini donuts I've ever had in my entire life!  I saw Mena from The Sew Weekly from a distance.  I recognized her by her dress.

Also, my sewing friend made me the the most beautiful woven scarf. I'm definitely sharing pictures as soon as it dries (I just washed it to full it a little bit).

School just started back up again today and I'll have a report shortly. I love my textile science class!  I've already learned so much in just 3 hours!  I'm going to be doing a lot of blogging this weekend I think :)

Finally, THANKS to my newest followers Lindsey and Jen of Sew Frugal & Fashionable!

Thursday, March 31, 2011

Goals

Do you remember this from June of last year?  Geez, still a UFO, but night before I went to visit The Boyfriend in Northern Ca (still here btw),  I worked on the muslin.  I think I actually got it to fit! I had to take in the skirt (and straighten out the curve in the hip area), lengthen the skirt back darts and narrow them, narrow the skirt front darts, take in the bodice side seams, and take in the CB seam gradually from the waistline to the neck.  I hope this doesn't throw off the grainline, but it seemed to work in the muslin. I should probably slash it in the middle of the pattern piece at the back, overlap the amount I need and then add back to the CB line to keep the grainline straight.  Yeah, that's what I might do.  Does that make sense? I'm not sure it does.  I also decided to raise the waistline up 1/2".  Oh, and I made a hefty sloping should adjustment and I shortened the skirt by 2".

I have 3 whole days at the Craft Center and I'm going to sew! I have the fabric and lining picked out for this dress, and I plan on making muslins for a Cynthia Rowley dress, and a vintage shirt dress.


 Who knows how far I'll get, but I'll take pictures along the way. Unfortunately,  my cord to my camera is still at home so I won't be able to upload any time soon.  :(  I'm so excited to have time and a place to sew again.  Its like a mini sew-cation!

I also get to go to the Alameda Flea Market on Sunday! HOoray!  I hope the weather stays nice!

And since I have nothing new to show you, here's Pearl:

Wednesday, March 30, 2011

Spaghetti Strap Tutorial!


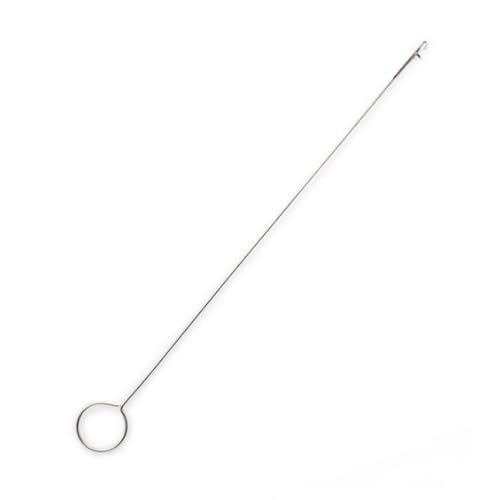
Last quarter I learned how to make spaghetti straps.  Spaghetti can be used as straps for a dress or blouse (duh!) or as a tie for a casing and I'm sure for hundreds of other applications.  Making sturdy and thick (as in fully stuffed!) 1/4" spaghetti isn't all that hard, but it can be a little tricky to start.  It's difficult to fit 1 1/2" of fabric into a 1/4" tube!  Making the spaghetti for my bias slip dress was a pain in the butt and required a whole lot of muscle because the tube was seemingly never ending!  I used a standard loop turner you can buy pretty much anywhere (Joann's, Hancock, Amazon, etc).  It isn't my favorite tool to use for turning all tubes, just spaghetti.  
So in my sewing class, my teacher taught us a trick that not all instructors apparently teach, which I found really useful.  The trick is essentially making a funnel at the top of the bias tube so the I ended up teaching it to a couple of students in my draping class because we had to make spaghetti again for our sewing sample binder.

So here it goes:

1)  Make 2" wide bias tape.  There are many tutorials out there.  Just make sure your bias tape is 2" wide because you need the extra fabric to "stuff" into the 1/4" tube.  Fold and press the bias tape in half.


2)  With the cut edges on your left, place the tape on your machine bed with the needle on cut edge about 1/2" down from the top edge.    

3)  Start stitching (don't forget to backstitch a few stitches) with a regular stitch length diagonally to the folded edge.  Stop when you get 1/4" away from the folded edge.  You want to make sure the diagonal stitch is gradual and pretty long.  You want a substantial funnel shape.  This funnel is what allows for an easier turn.  Less fabric has to be forced into the tube at first making it easier.  


4)  Continue to stitch at a 1/4" from the folded edge the rest of the length of the bias tape.


5)  Cut off the top of the funnel to the first stitch.


6)  So for the next part I don't have pictures.  Insert your loop turner into the skinny end of the tube (not the funnel side).  Hook the latch end of the loop turner to the top of the funnel.  I actually poke a hole in the fabric with the moveable latch because you will be cutting off the funnel part once it is is completely turned. The funnel makes it easier to turn. 

7) When you are pulling the fabric, hook the circle end of the loop turner to your sewing machine or some other place and it will be your third hand! A big help!   

8) You end up with stuffed spaghetti! You can really do this thinner, but your original bias strip will have to be less wide as well.  


If you want to buy a loop turner, here's one on Amazon!

And thanks to my new Followers!  Woohoo!  I'm totally giving away some fun vintage patterns once I hit 75 followers!  It's getting trickier and trickier to figure out who is following me on blogger I think my new followers are: 

Andrea, Marta, and Faye of Fayes Sewing Adventure!  Love her blog! She makes some really nice garments! My favorite was her Colette Patterns coat!  She also just had her blogoversary so go to her site and give her some love.  

If I missed anyone, tell me! I'd be happy to give you and your blog a shout-out!